Setting Up Monorepo for a Unity Project
In a Client-Server architecture, the client and the server need to share the api codebase for consistency. Some solutions to do so are as follows:
- Git submodule: Have three repositories (
client,server,api). Theclientrepo adds theapirepo as a submodule. Do the same for theserver. - Monorepo: Have one repository (say
MyGame). Create three directories at the root:/Client,/Serverand/Api, each containing its corresponding codes. - Symlink: Create a Symlink to the API for the client and the server to reference.
- …and many more.
I prefer monorepo for simplicity, but setting one up with Unity wasn’t simple because it can’t easily reference external .csproj and its binaries.
This post explains how to set up a monorepo with a .NET server and a Unity client sharing one .csproj.
Job 1: Set up Directory Structure
Step 1: Set up directories on CLI
Create a directory. This will be the root.
mkdir MyGame
Enter it.
cd MyGame
Create a server project.
dotnet new console -o MyGame.Server
Create an API one, too.
dotnet new classlib -o MyGame.Api
Now the structure should look as below.
MyGame
├── MyGame.Api
│   ├── Class1.cs
│   ├── MyGame.Api.csproj
│   └── obj
│       ├── MyGame.Api.csproj.nuget.dgspec.json
│       ├── MyGame.Api.csproj.nuget.g.props
│       ├── MyGame.Api.csproj.nuget.g.targets
│       ├── project.assets.json
│       └── project.nuget.cache
└── MyGame.Server
    ├── MyGame.Server.csproj
    ├── obj
    │   ├── MyGame.Server.csproj.nuget.dgspec.json
    │   ├── MyGame.Server.csproj.nuget.g.props
    │   ├── MyGame.Server.csproj.nuget.g.targets
    │   ├── project.assets.json
    │   └── project.nuget.cache
    └── Program.cs
Step 2: Set up a Unity project
In Unity Hub, navigate to Projects - New Project to create a project. Set the project name as desired. Set its location to point to the root. Check out the screenshot below:
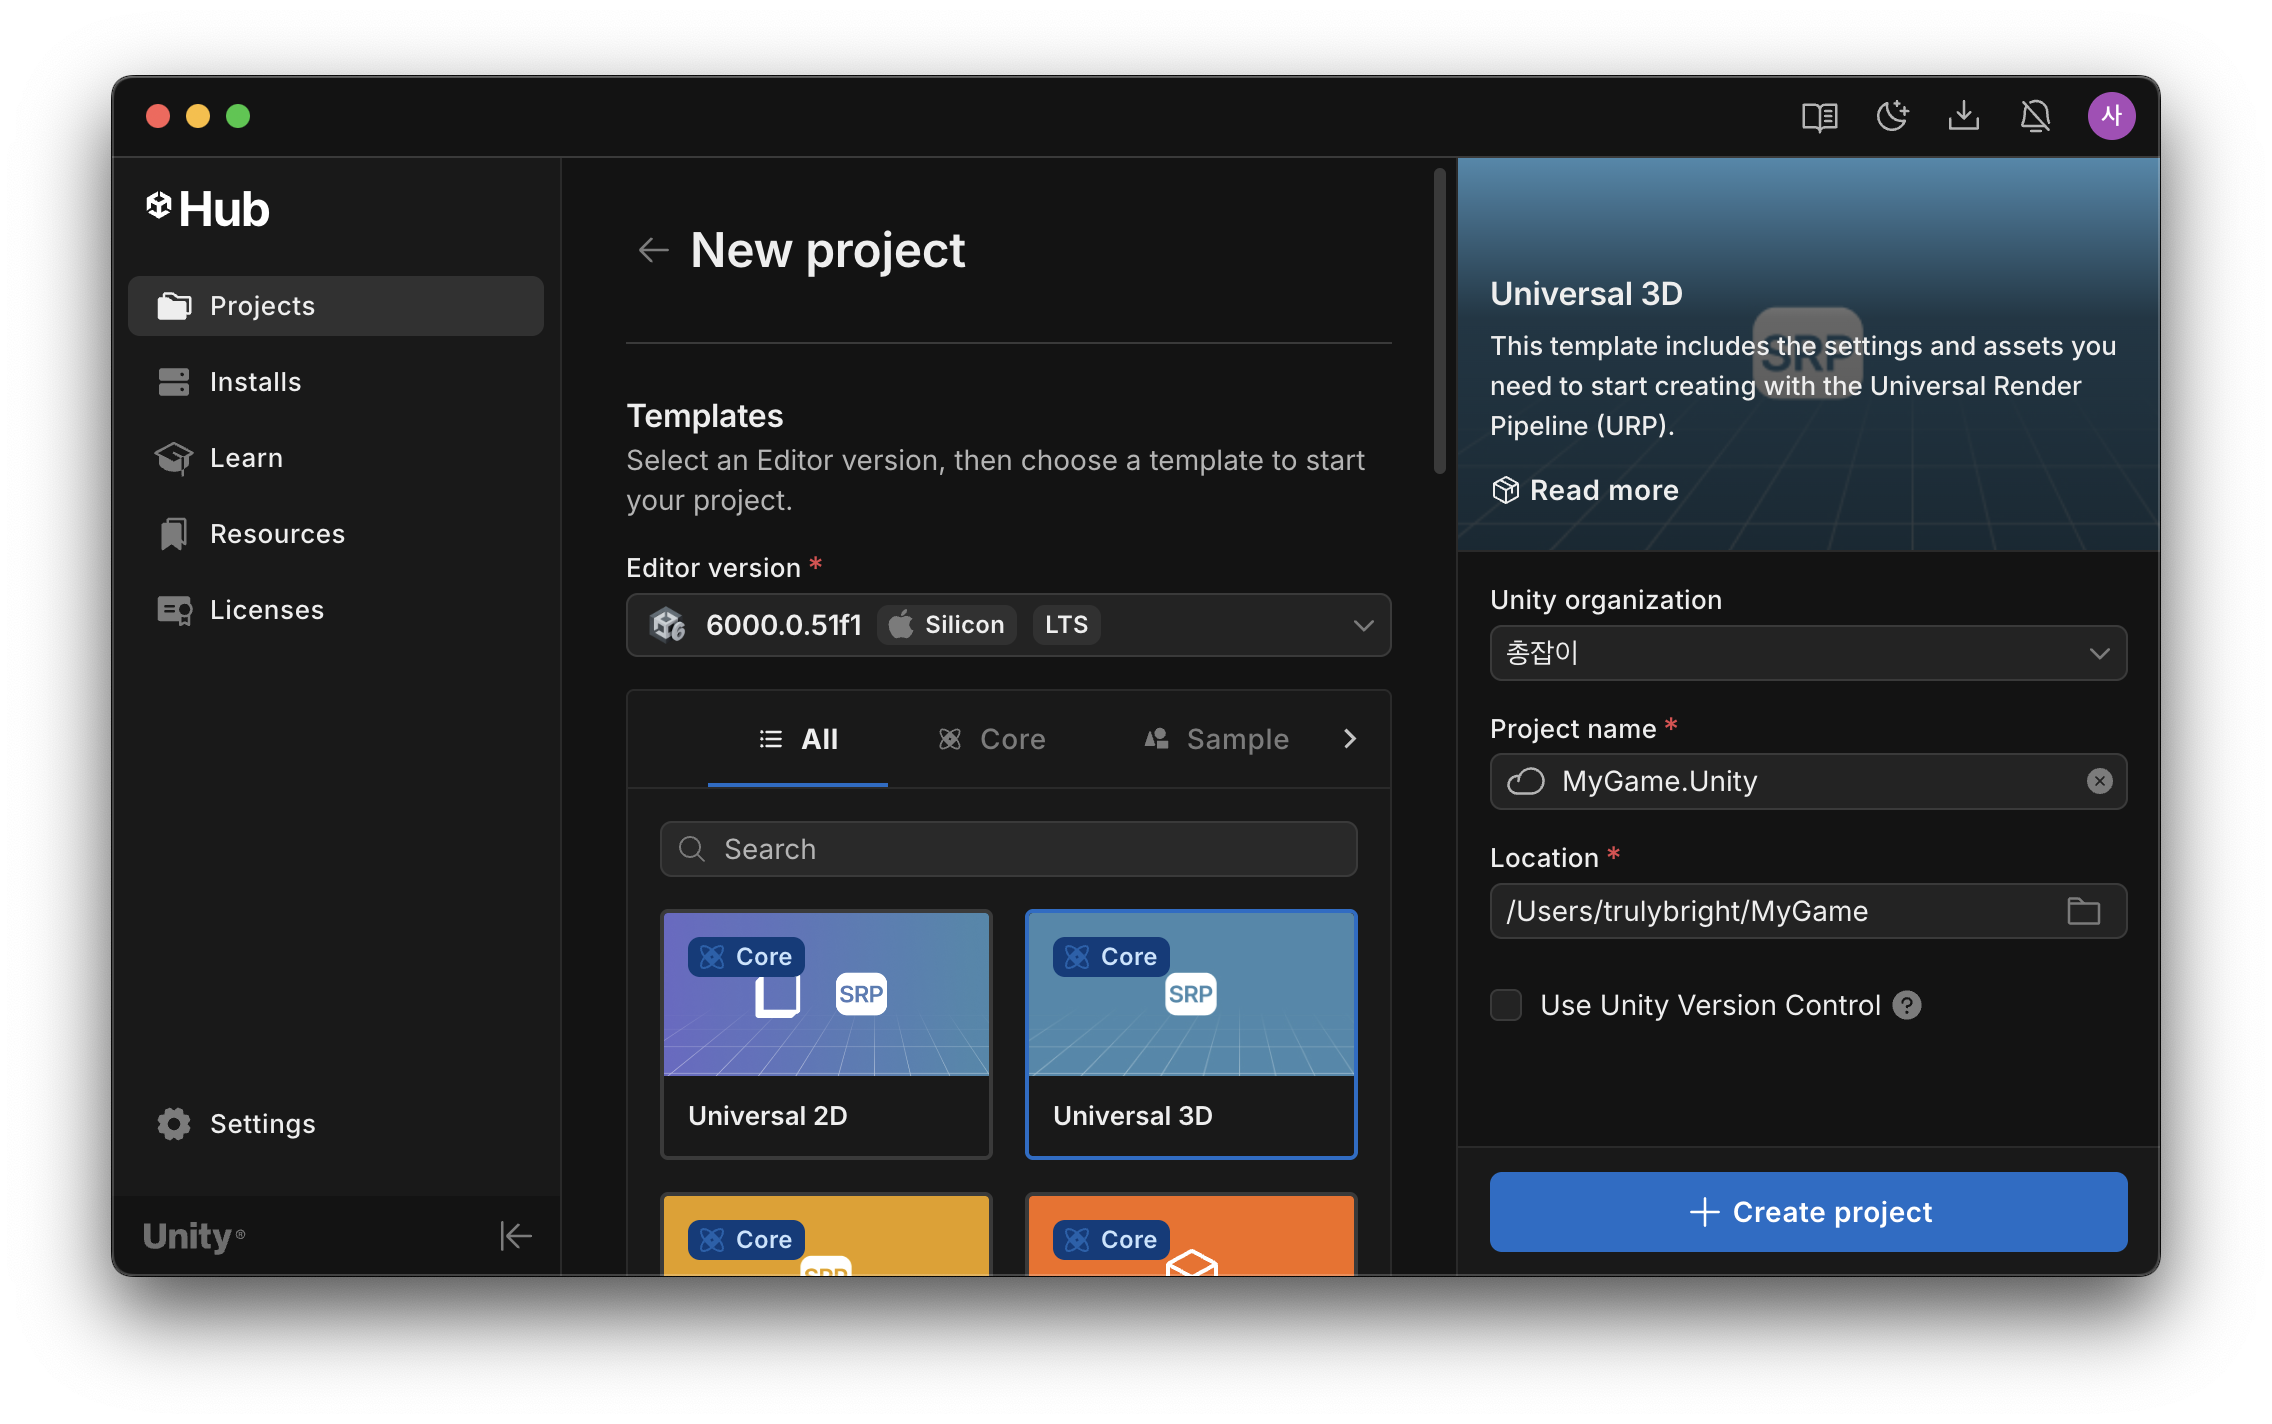
Click on Create Project.
Now the structure should look as below.
MyGame
├── MyGame.Api
│   ├── Class1.cs
│   ├── MyGame.Api.csproj
│   └── obj
├── MyGame.Server
│   ├── MyGame.Server.csproj
│   ├── obj
│   └── Program.cs
└── MyGame.Unity
    ├── Assembly-CSharp-Editor.csproj
    ├── Assembly-CSharp.csproj
    ├── Assets
    ├── Library
    ├── Logs
    ├── MyGame.Unity.sln
    ├── Packages
    ├── ProjectSettings
    ├── Temp
    └── UserSettings
Job 2: Set up a Solution
Step 0: Why bother to make a solution
Typical .NET projects have the following structure,
MySolution
├── ProjectA
│   ├── ProjectA.csproj
│   ├── src
├── ProjectB
│   ├── ProjectB.csproj
│   ├── src
├── ProjectC
│   ├── ProjectC.csproj
│   ├── src
├── MySolution.sln
where MySolution.sln, a solution file, references the three .csproj files.
We need a solution because Visual Studio and JetBrains Rider need one to see the projects in one view. With no solution, you have to open an editor window per .csproj. That’s inconvenient. To view all projects in one window is the point of monorepo.
Step 1: Initialize Root Solution
At the root directory, create a solution file.
dotnet new sln
Include the server project.
dotnet sln add MyGame.Server
Also for the API.
dotnet sln add MyGame.Api
Open the .sln file to confirm it’s proper. (Sad that highlight.js doesn’t support .sln.)
Microsoft Visual Studio Solution File, Format Version 12.00
# Visual Studio Version 17
VisualStudioVersion = 17.0.31903.59
MinimumVisualStudioVersion = 10.0.40219.1
Project("{FAE04EC0-301F-11D3-BF4B-00C04F79EFBC}") = "MyGame.Server", "MyGame.Server\MyGame.Server.csproj", "{26648224-98E5-41F1-9C31-FD4626A9F721}"
EndProject
Project("{FAE04EC0-301F-11D3-BF4B-00C04F79EFBC}") = "MyGame.Api", "MyGame.Api\MyGame.Api.csproj", "{19865AC1-8B76-4F0F-B428-212DDA4A1EAF}"
EndProject
Global
	GlobalSection(SolutionConfigurationPlatforms) = preSolution
		Debug|Any CPU = Debug|Any CPU
		Debug|x64 = Debug|x64
		Debug|x86 = Debug|x86
		Release|Any CPU = Release|Any CPU
		Release|x64 = Release|x64
		Release|x86 = Release|x86
	EndGlobalSection
	GlobalSection(ProjectConfigurationPlatforms) = postSolution
		{26648224-98E5-41F1-9C31-FD4626A9F721}.Debug|Any CPU.ActiveCfg = Debug|Any CPU
		{26648224-98E5-41F1-9C31-FD4626A9F721}.Debug|Any CPU.Build.0 = Debug|Any CPU
		{26648224-98E5-41F1-9C31-FD4626A9F721}.Debug|x64.ActiveCfg = Debug|Any CPU
		{26648224-98E5-41F1-9C31-FD4626A9F721}.Debug|x64.Build.0 = Debug|Any CPU
		{26648224-98E5-41F1-9C31-FD4626A9F721}.Debug|x86.ActiveCfg = Debug|Any CPU
		{26648224-98E5-41F1-9C31-FD4626A9F721}.Debug|x86.Build.0 = Debug|Any CPU
		{26648224-98E5-41F1-9C31-FD4626A9F721}.Release|Any CPU.ActiveCfg = Release|Any CPU
		{26648224-98E5-41F1-9C31-FD4626A9F721}.Release|Any CPU.Build.0 = Release|Any CPU
		{26648224-98E5-41F1-9C31-FD4626A9F721}.Release|x64.ActiveCfg = Release|Any CPU
		{26648224-98E5-41F1-9C31-FD4626A9F721}.Release|x64.Build.0 = Release|Any CPU
		{26648224-98E5-41F1-9C31-FD4626A9F721}.Release|x86.ActiveCfg = Release|Any CPU
		{26648224-98E5-41F1-9C31-FD4626A9F721}.Release|x86.Build.0 = Release|Any CPU
		{19865AC1-8B76-4F0F-B428-212DDA4A1EAF}.Debug|Any CPU.ActiveCfg = Debug|Any CPU
		{19865AC1-8B76-4F0F-B428-212DDA4A1EAF}.Debug|Any CPU.Build.0 = Debug|Any CPU
		{19865AC1-8B76-4F0F-B428-212DDA4A1EAF}.Debug|x64.ActiveCfg = Debug|Any CPU
		{19865AC1-8B76-4F0F-B428-212DDA4A1EAF}.Debug|x64.Build.0 = Debug|Any CPU
		{19865AC1-8B76-4F0F-B428-212DDA4A1EAF}.Debug|x86.ActiveCfg = Debug|Any CPU
		{19865AC1-8B76-4F0F-B428-212DDA4A1EAF}.Debug|x86.Build.0 = Debug|Any CPU
		{19865AC1-8B76-4F0F-B428-212DDA4A1EAF}.Release|Any CPU.ActiveCfg = Release|Any CPU
		{19865AC1-8B76-4F0F-B428-212DDA4A1EAF}.Release|Any CPU.Build.0 = Release|Any CPU
		{19865AC1-8B76-4F0F-B428-212DDA4A1EAF}.Release|x64.ActiveCfg = Release|Any CPU
		{19865AC1-8B76-4F0F-B428-212DDA4A1EAF}.Release|x64.Build.0 = Release|Any CPU
		{19865AC1-8B76-4F0F-B428-212DDA4A1EAF}.Release|x86.ActiveCfg = Release|Any CPU
		{19865AC1-8B76-4F0F-B428-212DDA4A1EAF}.Release|x86.Build.0 = Release|Any CPU
	EndGlobalSection
	GlobalSection(SolutionProperties) = preSolution
		HideSolutionNode = FALSE
	EndGlobalSection
EndGlobal
It’s fine as long as MyGame.Server and MyGame.Api are referenced.
Now the structure should look as below.
MyGame
├── MyGame.Api
│   ├── Class1.cs
│   ├── MyGame.Api.csproj
│   └── obj
├── MyGame.Server
│   ├── MyGame.Server.csproj
│   ├── obj
│   └── Program.cs
├── MyGame.sln <--- Hi there!
└── MyGame.Unity
    ├── Assembly-CSharp-Editor.csproj
    ├── Assembly-CSharp.csproj
    ├── Assets
    ├── Library
    ├── Logs
    ├── MyGame.Unity.sln
    ├── Packages
    ├── ProjectSettings
    ├── Temp
    └── UserSettings
Step 2: Reference Unity-Generated .csproj files
Try opening MyGame.sln in Visual Studio or Rider and look at the explorer.
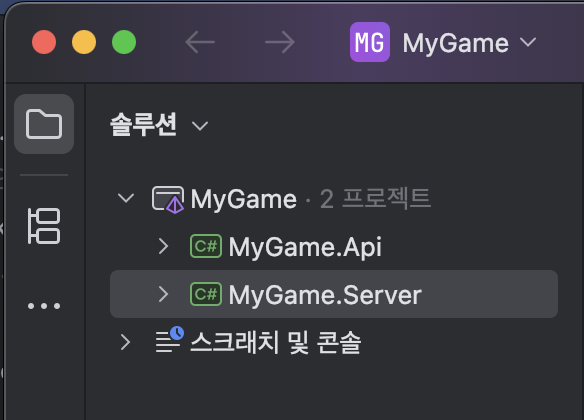
The Unity project is not found because we haven’t added Unity-Generated .csproj files, namely Assembly-CSharp-Editor.csproj and Assembly-CSharp.csproj, to the root solution. Let’s add them.
dotnet sln add MyGame.Unity/Assembly-CSharp-Editor.csproj
dotnet sln add MyGame.Unity/Assembly-CSharp.csproj
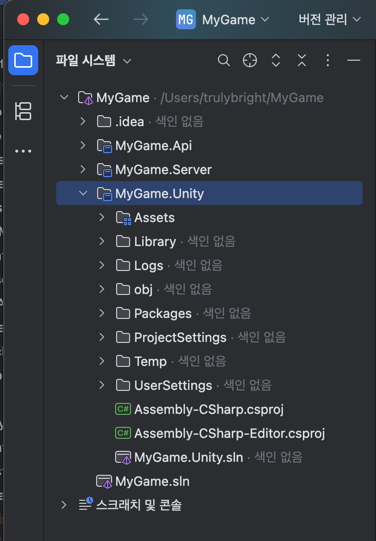
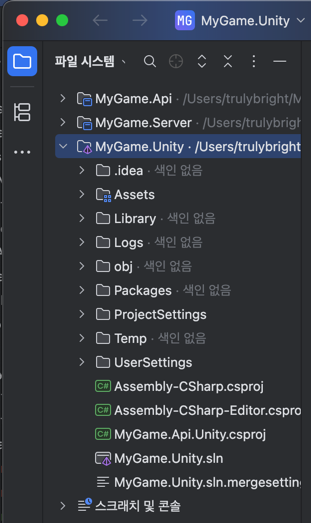
Back in the editor, toggle the view from “Solution” to “File System” and you will see everything in one view:
Now you are done setting up the solution.
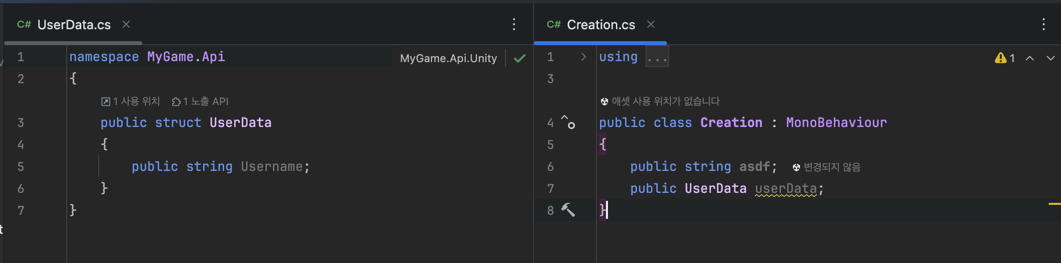
But /MyGame.Unity can’t yet reference anything in /MyGame.Api; try creating a struct in /MyGame.Api and reference it in /MyGame.Unity. It reports a compile error.
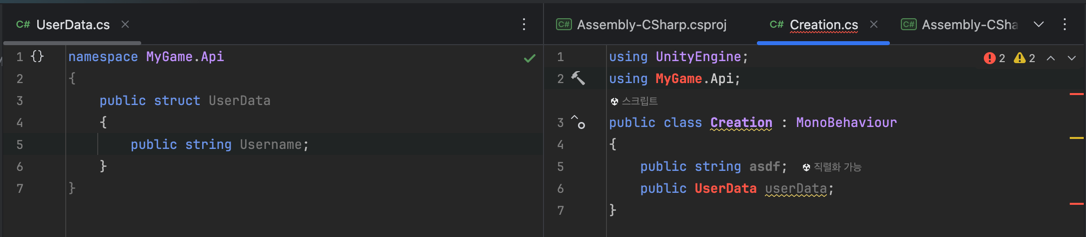
It’s an expected behavior, as we didn’t help /MyGame.Unity reference /MyGame.Api. To help reference external api, we need to make it a custom package.
Job 3: Set up a Package
Step 1: Make API a package
Create a file named package.json at the root of the api.
cd MyGame.Api
touch package.json
Fill it with the following:
{
  "name": "com.companyname.mygame.api.unity",
  "version": "1.0.0",
  "displayName": "MyGame.Api.Unity",
  "description": "MyGame.Api.Unity"
}
Create a file named MyGame.Api.Unity.asmdef at the same location. The file’s name must be different from the name of the api directory. i.e., it can be anything but MyGame.Api.asmdef.
touch MyGame.Api.Unity.asmdef
Fill it with the following:
{
    "name": "MyGame.Api.Unity"
}
Now the API directory has become a unity package whose binary you can freely import.
Step 2: Import the API as a custom package
In the Unity editor, navigate to Window - Package Manager. Click on + Icon at top left corner and select Install Package from disk....
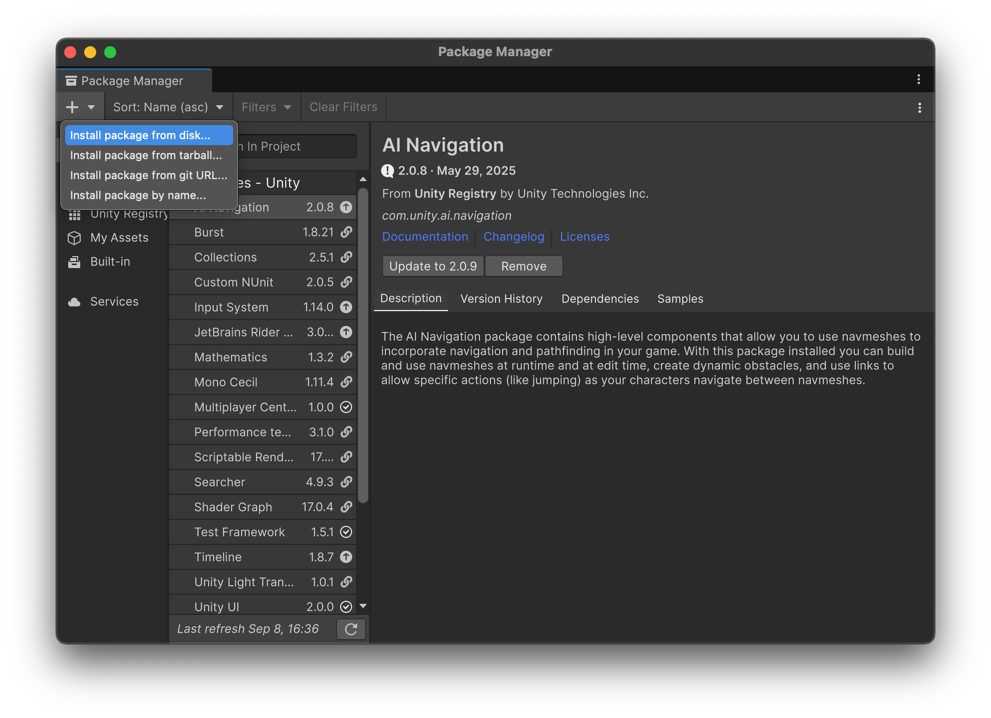
In the popup, select package.json under /MyGame.Api and click on “Open”. The package should be installed.
Step 2.5 : Troubleshooting GlobalUsings.g.cs(2,1): error CS8773: Feature 'global using directive' is not available in C# 9.0. Please use language version 10.0 or greater.
If you encounter this error, it is due to an auto-generated file similar to the following.
// <auto-generated/>
global using global::System;
global using global::System.Collections.Generic;
global using global::System.IO;
global using global::System.Linq;
global using global::System.Net.Http;
global using global::System.Threading;
global using global::System.Threading.Tasks;
As for the time of writing, Unity 6, its latest version, supports C# up to 9.0, which does not support global using.
To solve it, simply remove <ImplicitUsings>enable</ImplicitUsings> from MyGame.Api.csproj.
<Project Sdk="Microsoft.NET.Sdk">

  <PropertyGroup>
    <TargetFramework>net9.0</TargetFramework>
    <ImplicitUsings>enable</ImplicitUsings> // remove this line
    <Nullable>enable</Nullable>
  </PropertyGroup>

</Project>
Don’t forget to delete /bin and /obj under /MyGame.Api.
Step 3: Confirm it compiles
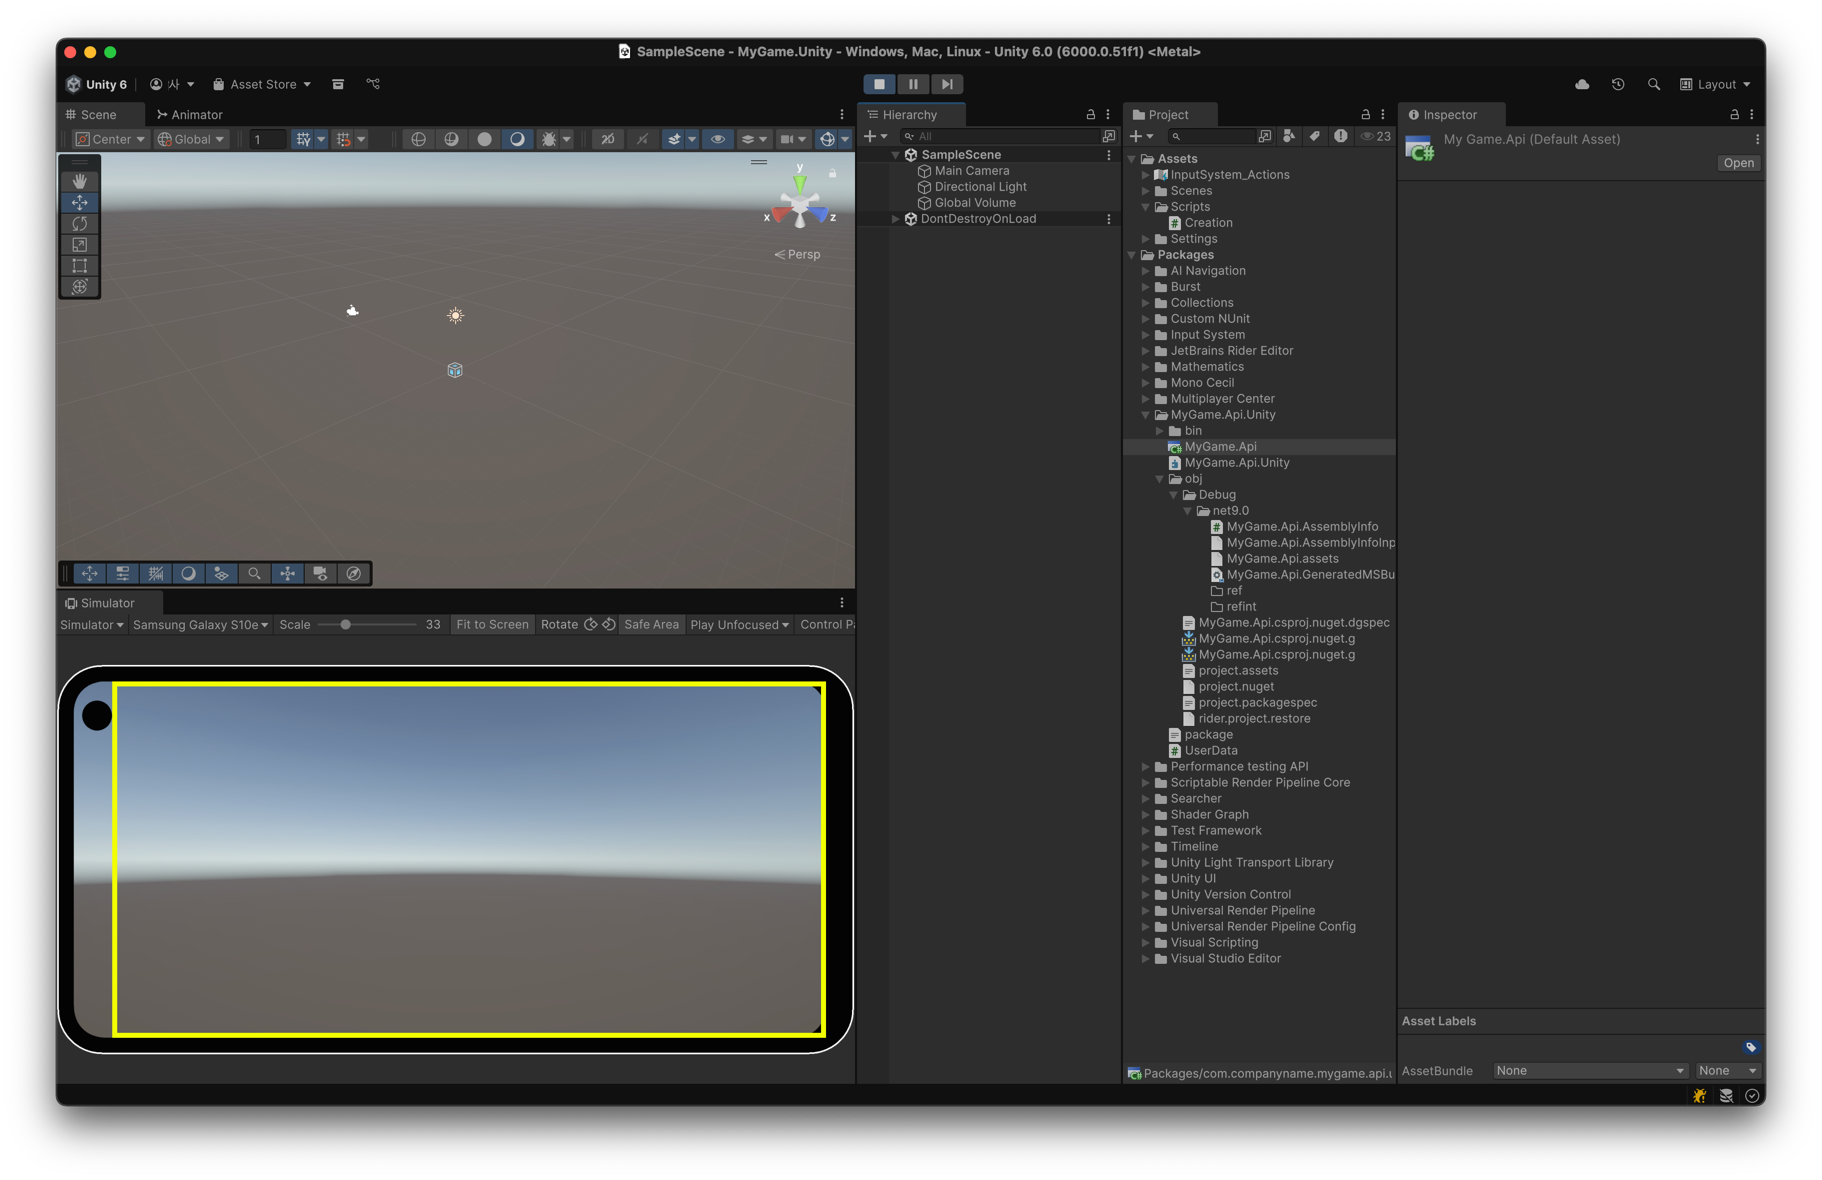
Don’t look at the IDE but simply enter the playmode in the Unity editor. It runs fine.
But there is a problem: you still see error message in the IDE, though it compiles in the Unity editor.

It reports errors because the IDE doesn’t know you provided Unity with external codes. We did it via UPM and .asmdef but they don’t notify .csproj or .sln files of it.
The final step is thus to notify them so that the IDE detects the import.
Job 4: Use SlnMerge to notify the IDE
SlnMerge is a tool to automatically merge a Unity-Generated solution to another. This final job uses it to tell the IDE that Unity has the required binaries.
Step 1: Install SlnMerge
In the Unity editor, navigate to Window - Package Manager. Click on + Icon at top left corner and select Install Package from git URL... Note it’s not from disk.
Type https://github.com/Cysharp/SlnMerge.git?path=src into the input and press Install.

SlnMerge should be installed shortly. If it doesn’t, follow the instructions in its GitHub README.
Step 2: Set up SlnMerge
Create MyGame.Unity.sln.mergesettings right under /MyGame.Unity, not under /Assets.
touch MyGame.Unity.sln.mergesettings
Fill it with the following:
<SlnMergeSettings>
    <MergeTargetSolution>../MyGame.sln</MergeTargetSolution>
</SlnMergeSettings>
The target solution directory is the relative path to the root solution.
Step 3: Run SlnMerge and Open the IDE
To run SlnMerge, just close the Unity editor and re-open it. SlnMerge’s script will run on its loading.
When the editor finishes loading, open MyGame.Unity.sln in the IDE. Note it’s not MyGame.sln, the solution we created on command line. Open MyGame.Unity.sln which Unity auto-generated.
And if you look at the IDE’s explorer tab, you will see the three directories at once:
and you can confirm the IDE reports no compile error.
That’s it. Now you are all set. Happy hacking!